Gaming Mouse With Buttons on the Side: Swappable Panels Compared
By Leila Haddad • 10th Jun

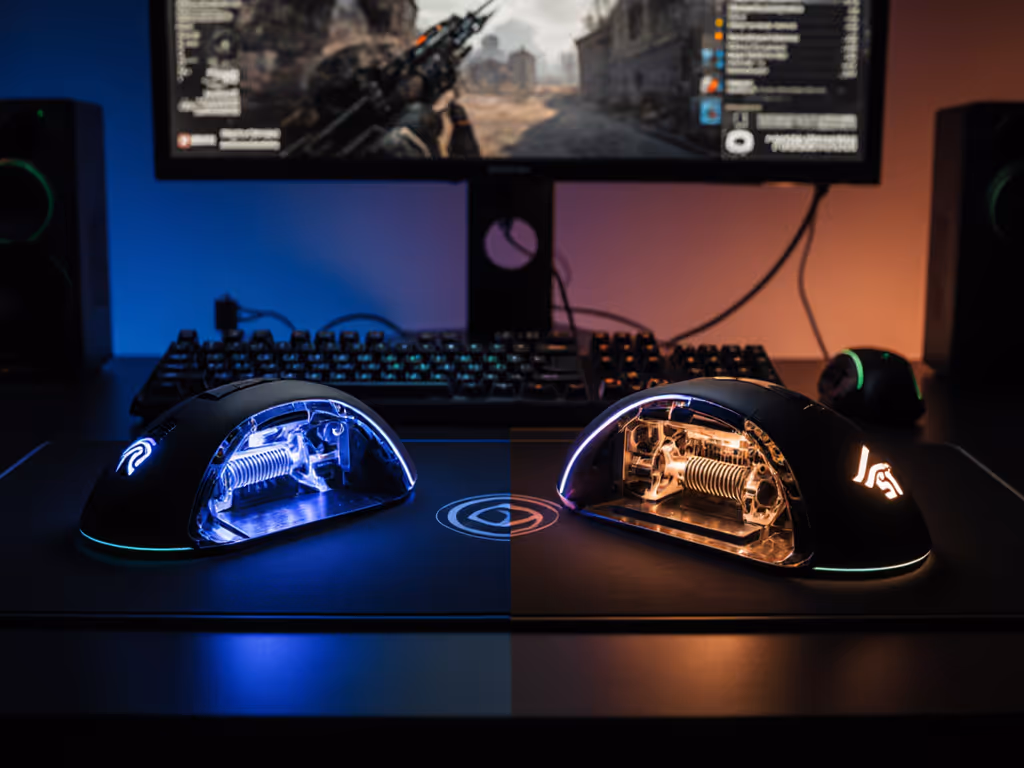
A gaming mouse with buttons on the side can be a cheat code for control (or a source of accidental presses and strain) depending entirely on how the side layout matches your hand geometry and grip. When you add modular shells into the mix, a good swappable panel comparison stops being about "how many buttons" and becomes "which panel keeps my thumb neutral, relaxed, and precise for my specific hand size."
If you've ever bought a mouse online, only to realize the side buttons sit just out of reach for your small hand, or dig into your thumb during long holds, you already know why fit has to come before features. Growing up, I played on skewed right-handed shells that fought my left-handed aim; the first time I tried a low-profile ambidextrous shape that simply disappeared under my grip, my micro-corrections suddenly felt automatic. That's the experience I want to reverse-engineer here: not hype, but geometry that respects your hand.
This deep-dive is built for:
- Small-hand players trying to avoid overreaching and thumb strain.
- Left-handed users looking for left-handed side button layout options or at least ambi-safe compromises.
- MMO/MOBA/FPS players deciding between 2-button sides, 6-8 button clusters, and full MMO grids. For a genre-by-genre breakdown of layouts and must-have features, see our FPS vs MMO guide.
- Anyone curious whether quick-swap panels are a real advantage or just marketing.
Control begins with geometry that respects your hand (side panels included).
FAQ 1: What counts as a "gaming mouse with buttons on the side," and who actually benefits from swappable panels?
A gaming mouse with buttons on the side is any mouse that adds one or more programmable buttons along the thumb side, beyond the standard left/right click and scroll wheel. These side controls are typically mapped to weapon swaps, abilities, or macros so you can trigger actions without moving your fingers off primary aim and movement inputs.
Side buttons are especially useful in:
- MMO/MOBA/RPG titles where you juggle 10+ abilities, macros, or item activations.
- Tactical shooters and battle royales for push-to-talk, ping, map, or utility binds without leaving WASD.
- Productivity/creative work for forward/back navigation, macros, or frequently used shortcuts in apps and browsers.
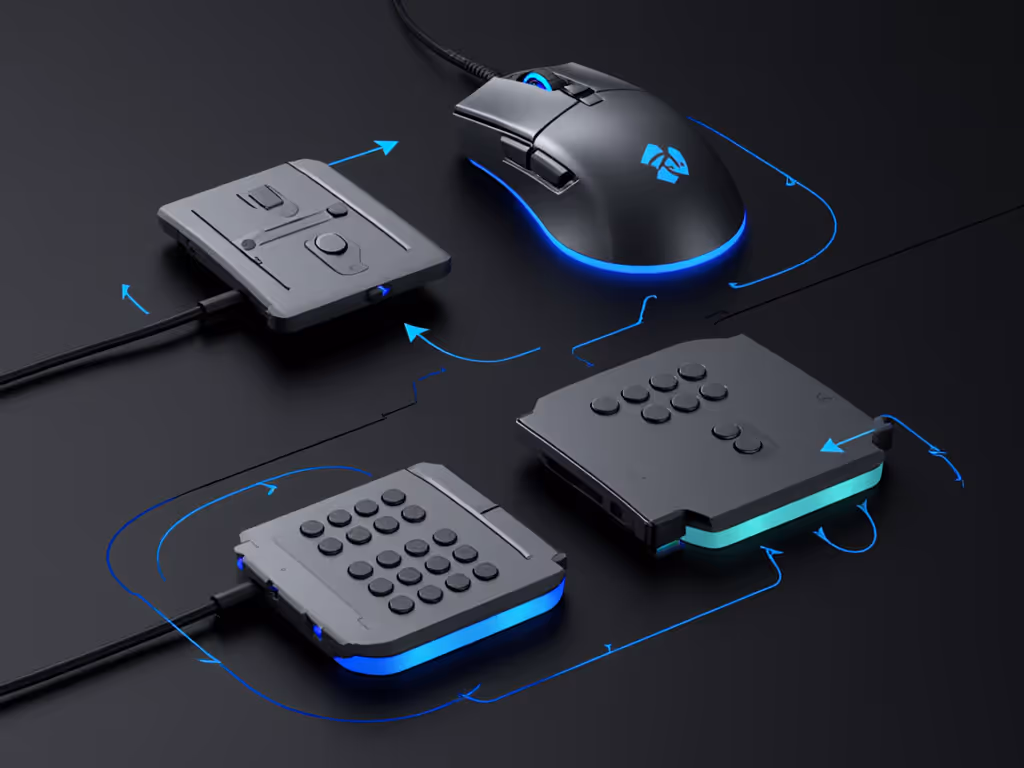
Swappable panels extend this concept by letting you physically change the side layout, usually among:
- A simple 2-button panel for FPS.
- A 6-8 button cluster for hybrids.
- A 12-button MMO grid for maximum bindings.
- Sometimes a flat/blank panel to remove accidental presses.
Instead of buying multiple mice, you adapt the shell to the game. The catch: if none of the panels actually match your thumb length, grip, and preferred hand angle, the flexibility is wasted.
FAQ 2: How do I measure my hand and "small hand button reach" for side panels?
To compare swappable panels intelligently, you need numbers, not guesses. For a deep primer on sizing, grip, and avoiding RSI, start with our gaming mouse ergonomics guide. Here's a simple, repeatable way to measure fit.
Step 1: Measure hand length and width (mm)
- Place your hand flat on paper and trace it.
- Measure from the tip of your middle finger to the center of your wrist crease, this is hand length.
- Measure the widest point across your palm (excluding thumb), this is hand width.
As rough guidance for gaming mice:
- Small hands: length under ~175 mm, width under ~85-90 mm.
- Medium: ~175-195 mm length.
- Large: above ~195 mm length.
If you're on the edge, treat yourself as small/medium rather than medium/large for side-button reach; most commercial shapes are biased toward larger hands.
Step 2: Measure thumb neutral position
Still using the traced outline:
- Draw a vertical centerline through your hand from middle fingertip to wrist.
- Mark where the pad of your thumb naturally rests when you make your typical mouse grip (palm, claw, or fingertip).
- Measure horizontally from that centerline to the thumb pad mark.
Call this thumb lateral reach. For many small hands, it falls around 35-45 mm; for larger hands, 45-55 mm or more. This value roughly correlates with how far your thumb can comfortably travel across side buttons without collapsing your grip.
Step 3: Translate those numbers to panel layouts
When you look at a side panel (in product shots or diagrams), pay attention to:
- Forward-most button distance: If the front-most side button sits too far toward the nose, small-hand users will have to curl or overextend their thumb to hit it.
- Rear-most button distance: If the back-most button sits behind your thumb joint, you'll end up regripping or sliding your hand back to reach it, bad for consistency.
- Vertical stacking: Tall MMO grids can force small thumbs to angle awkwardly up or down, not just forward or back.
For small hands, the ideal is:
- You can press every intended button with a minimal thumb slide, without peeling your ring or pinky off the mouse.
- You do not have to bend your thumb tip sharply inward or upward, your thumb pad should stay relatively flat and neutral.
If you already own a mouse:
- Note the panel style that feels best.
- Count how many side buttons on that mouse are truly usable without strain.
- Use that as a baseline; if you comfortably access only 2-4, an intense 12-grid may not suddenly become effortless just because it's swappable.
FAQ 3: What side-panel types exist, and how do they change ergonomics for different hands?
Below is a practical comparison of typical swappable side panels and how they interact with hand size and grip.
| Panel Type | Typical Button Count | Best Use-Cases | Key Pros | Key Cons for Small Hands & Lefties |
|---|---|---|---|---|
| Classic FPS | 2-3 | FPS/BR, arena shooters | Simple, low risk of misclicks, easy to reach for most hands. | Often placed forward for larger thumbs; rear button can be hard to reach for <175 mm hands. Usually right-thumb only. |
| Mini Cluster | 4-6 | Hybrid FPS + abilities, ARPGs | More binds without full grid; can still keep thumb fairly neutral. | If buttons are in a straight row, small thumbs may have to roll uncomfortably; angles matter a lot. Right-hand bias is common. |
| MMO Grid | 9-12 | MMOs, MOBAs, keybind-heavy games. | Maximum on-mouse commands, great for complex rotations and macros. | High cognitive load; small hands often can't reach top or bottom rows without curling thumb. Usually only on right side, no true left-handed side button layout. |
| Blank/Flat Shell | 0-1 | Pure aim, Kovaak's/Aim Lab, low-accidental-press FPS | Zero risk of misclicks; can improve grip consistency and comfort. | No on-mouse utility binds; may feel like a downgrade if you rely on side buttons for PTT or abilities. |
For small-hand button reach, clusters where buttons are angled toward the thumb pad at rest are far more usable than straight-line or tall grids. Slightly taller buttons with clear separation ridges also help you index by feel instead of staring at your mouse mid-fight.
When you compare panels, treat button angles and separation as seriously as button count.
For left-handed players, most swappable systems target right-handed thumbs only. When I evaluate these as a lefty, I look for:
- A genuinely ambidextrous shell with primary side buttons on both sides.
- The option to choose a blank right panel plus strong top-button remapping, so I can move most utility binds to M4/M5 on the left side and keep the off-side inert.
- Or at minimum, software that lets me completely disable the off-side panel to avoid accidental presses from my ring finger.
True ambi isn't compromise; it's alignment between hand and target.
FAQ 4: How do quick panel swapping mechanisms work, and do they affect performance or durability?
Most modular mice use one of three quick panel swapping mechanisms:
-
Magnets only: The panel snaps into place with magnets.
- Fastest to swap; often tool-less.
- Risk of minor lateral play if tolerances aren't tight.
-
Magnet + mechanical latch: A latch or slide lock secures the panel over guiding magnets.
- Slightly slower to change but more secure.
- Better for players who grip hard or lift frequently.
-
Screw-in panels (semi-modular): Less common now but still around.
- Most secure, virtually zero play.
- Not quick swap in practice, you'll rarely change mid-session.
From a performance standpoint:
- Weight impact: Extra panels and attachment hardware add a few grams. For ultra-light FPS purists, that may matter more than the extra buttons.
- QC and rattles: More moving pieces mean more potential for creaks or rattles if tolerances are loose or magnets weaken over time. This is where user impressions and teardown insights become crucial.
- Grip consistency: If the panels sit perfectly flush, you'll forget they're modular. If they have even a subtle seam or step, your ring finger or thumb might feel it on every flick.
For most players, the ergonomic gain of using the correct panel outweighs the minimal mechanical downside, as long as the mechanism is firm enough to eliminate wiggle. If you're highly sensitive to shell flex or noise, prioritize systems with an additional latch over magnets-only.
FAQ 5: How do I run a "button angle ergonomics test" at home?
You don't need lab equipment to compare side panels; you just need a structured test that focuses on button angle ergonomics and reach.
Test 1: Neutral grip hold
- Equip one panel.
- Take your normal grip and relax your hand completely.
- Without repositioning your hand, press each side button in turn.
Score each button mentally:
- 0: Can't press without regrip.
- 1: Reachable but requires stretch or thumb curl.
- 2: Comfortable press with minimal movement.
A panel where most of your intended buttons score 2 is a keeper. If more than half of them land at 0 or 1, the geometry doesn't match your small hand button reach.
Test 2: Flick + activate
- Load a tracking or target-switching scenario (Kovaak's, Aim Lab, or a practice range).
- Bind a frequently used action (reload, dash, melee, PTT) to one side button.
- Run a 5-10 minute session where you must hit that action repeatedly in the middle of flicks.
Watch for:
- Grip collapse when you press the button.
- Overflicks because you're pushing the mouse sideways while clicking.
- Missed or accidental activations.
Repeat with a different panel and compare your scores plus your fatigue level. Aim gains that come with extra tension are not long-term wins.
Test 3: Long-session comfort
- Use your main game for a full session (1-2 hours).
- Track any hotspots: side of thumb, base of thumb, or outer knuckle.
If specific side buttons always feel like they're under your thumb joint instead of your thumb pad, that panel's vertical placement doesn't match your anatomy.
For left-handed users, repeat the same tests but also verify that:
- Off-side buttons don't get triggered by your ring finger.
- The primary side (under your active thumb) has enough usable buttons without depending on mirrored layouts that favor righties.
This is where "lefty tested, not just tolerated" becomes more than a slogan (you should be evaluating whether the layout genuinely lets your off-hand aim without babysitting unused buttons).
FAQ 6: Are swappable side panels actually good for left-handed and ambidextrous players?
Most modular side systems are designed primarily for right-handed use, putting big panels under the right thumb and leaving the left side relatively bare or with a simple 2-button strip. True mirrored, left-handed side button layout options are still rare.
As a left-handed player, here's how I evaluate viability:
- Shell symmetry: Start by insisting on a true ambidextrous shell (centered hump, mirrored shape). This keeps your wrist neutral and makes button placement the only real variable.
- Functional left-side options: Ideally you get at least a 2-4 button panel on the left side (for left thumb) with good spacing and remappable firmware.
- Right-side management: You either:
- Swap to a blank or near-blank right panel, or
- Completely disable right-side buttons in software to avoid ring-finger misclicks.
True ambi isn't just about geometry; it's about mapping. An ambi shell with only one usable side is still a right-handed design in practice. For model recommendations that prioritize mirrored layouts, check our best left-handed and ambidextrous mice.
If you cannot find a fully mirrored modular mouse in your region:
- Choose an ambidextrous shell with fixed, minimal side buttons on both sides.
- Prioritize perfect shape and click feel over extreme button count.
- Use keyboard modifiers or a gamepad-style layout on the keyboard to cover what an MMO grid would have handled.
For left-handed small hands in particular, dense 12-button panels are often more trouble than they're worth unless the grid is unusually compact and angled aggressively toward the thumb pad.
FAQ 7: Should I pick fewer side buttons or a full MMO grid for my games?
The right answer depends on your genre mix and how much cognitive overhead you're willing to manage.
Pick a simpler 2-6 button panel if:
- You mainly play FPS, tactical shooters, or arena shooters.
- You rely on side buttons for just a handful of actions (melee, reload, utility, PTT).
- You have small hands or use a tight claw/fingertip grip that doesn't support big thumb excursions.
You'll get:
- Cleaner grip.
- Lower chance of misclicks.
- Easier muscle memory across games.
Consider a 9-12 button MMO grid if:
- You primarily play MMO/MOBA/ARPG titles where 8-12+ abilities or macros are in constant rotation.
- You prefer palm or relaxed claw grip and have enough thumb length to cover the grid without extreme curling.
- You're comfortable investing time into learning a complex thumb layout.
Benefits include:
- Reduced reliance on awkward keyboard modifiers.
- Faster ability chains and macro execution once the layout is learned.
Hybrid players (FPS + MMO) are the ones who gain most from swappable systems: a simple 2-3 button panel for competitive shooters, and a denser panel for MMO nights. Just remember that if your small hand can't comfortably use the dense panel, its theoretical versatility becomes irrelevant.
FAQ 8: Beyond the panels, what other specs should I prioritize?
Side panels are just one part of the system. To avoid buyer's remorse and drawer graveyard syndrome, cross-check these core specs as well:
- Sensor quality: Modern high-end sensors with adjustable CPI/DPI and stable tracking are essentially flawless for human-level aim; look for stable tracking instead of obsessing over max CPI.
- Polling rate & latency: 1000 Hz is already excellent for most players; higher rates (4K/8K) offer diminishing returns unless you are already highly optimized and sensitive to micro-latency. For genre-specific settings, see our optimal polling rates guide.
- Weight and balance: Heavier mice with dense side panels can strain smaller hands over long sessions; aim for a weight where you can track and flick for an hour without fatigue.
- Skates and surface: PTFE skates on a mid-speed pad are a safe default; glass skates and ultra-fast pads magnify inconsistencies in grip and button presses.
- Software and profiles: You'll need solid remapping support for side buttons, including macros and per-game profiles, plus the ability to store configs on-board to avoid software running in the background.
- Build quality: Pay attention to reports of double-click issues, wheel wobble, panel looseness, and coating wear, common pain points that can ruin an otherwise perfect fit.
When you see "esports-grade" marketing, translate it into: does this mouse track accurately, click reliably, and keep my hand comfortable for the full length of my sessions?
Where to go from here: turning comparison into control
If you want a structured way to turn this swappable panel comparison into an actual decision, try this:
- Trace your hand and record length, width, and thumb lateral reach in millimeters.
- List your primary games and count how many high-frequency actions you'd realistically bind to the mouse.
- Decide a panel ceiling: e.g., "I need 4-6 side buttons max; any more is optional, not mandatory."
- When evaluating mice online, filter out everything whose side layouts clearly exceed your reach or target count, no matter how hyped they are.
- If you buy a modular mouse, test every panel with the neutral-hold and flick-activation tests, then stick with the layout that keeps your thumb the most relaxed, even if it's the simplest one.
You'll know you've found the right combo when your aim feels like it did the first time a shape truly disappeared in your hand: less thinking about your mouse, more bandwidth for game sense, and a calm, stable crosshair that goes where you intend.
From there, your next exploration isn't more hardware, it's refining your layouts and sensitivities around a geometry that finally works for you.
Related Articles